Originally written by Hillgarm. Last Updated 2022-09-01
This has not been updated recently and has been reported as no longer working in current versions of the engine.
[System] Skill Swap (Depreciated)
Lex Talionis Event Editor offers enough power to build custom systems. They can be quite complex, and this is the case with skill swap.
In this guide, we will be covering all the requirements to build your own skill swap system using the tools available in the latest engine build.
It is expected for the reader to have prior experience in the editors and components used, as most of them will be glossed over due the amount of steps required. Check the documentation and other guides to get learn about these components.
We will be building the pieces in order of functionality, which may lead to a few back and forward.
You will be able to get the code at the end of every major step, mostly ready to use. It’s still recommended to go over every single step in order to understand the mechanisms and how to adjust them to individual project demands.
Index
Required editors and components
Understanding the problem
Events and Variables
Step 0: Understanding how to build tuple with strings
Step 1: Remove all skills from classes and units
Step 2: Set the Raw Data table
Step 3: Build an Initializer event
Step 3.1: Create a level start manager
Step 3.2: Set the initialization condition
Step 3.3: Retrieve the current class Index value
Step 3.4: Retrieve the current class data
Step 3.4.1: Add self contained class exceptions
Step 3.5: Retrieve the previous class data
Step 3.6: Set both skill tuples
Step 3.7: Assign the equipped skills
Complete script
Step 3.7+: Add more learned skills
Step 4: Build the skill unlock event
Step 4.1: Find the ClassData corresponding index
Step 4.2: Retrieve the skill based on the unit level
Step 4.2.1: Add self contained class exceptions
Step 4.3: Add the skill to the LearnedSkill tuple
Step 4.4: Auto equip the new skill
Complete script
Step 5: Create the Skill Swap base
Step 5.1: Create Slot skills
Step 5.2: Process the equipped skills group
Step 5.3: Build the equipped skills menu
Step 5.4: Add a refresh mechanism
Complete script
Step 6: Add skill swap as a menu option
Step 7: Build the Skill Swap Operations event
Complete script
Step 8: Build the operations
Step 8.A: Remove
Step 8.B: Reorder
Step 8.C: Add
Step 8.D: Replace
Step 8.E: Replace on level up
Step 9: Test the system
Required editors and components
Event:
Commands - game_var, set_unit_field, give_skill, remove_skill, trigger_script, for, if, table, choice
Skills
Raw Data
Objects, Attributes and Methods:
unit - klass, get_field(‘{field}’),
game - get_data(‘{raw data}’)
Understanding the problem
Skill swap is a really simple concept but it takes a couple of minor systems to work. We will use the standards set in Fire Emblem: Awakening for this guide.
A way to describe skill swap is the follow:
A system that grant units new individual skills by
leveling up based on their current class, providing
a wider array of options and personal customization
for each unique class the unit ventures in, only
limited by a maximum amount of simultaneously
equipped skills.
Here are the basic directions:
[SLOTS] Each unit can have up to a certain amount of skills, 5 in this instance.
[POLL] Every unit has its own individual collection of skills to pick from.
[INHERIT] Units have to own all the skills corresponding to their current class level and promotion path.
[UNLOCK] Skills are unlocked by leveling up
[ASSIGN] Skills are automatically equipped if a slot is available when the unit is introduced or when it learns a new skill.
[MANAGEMENT] The player can add, remove or swap skills at will.
These 6 points are the foundation of the system, and will have address them from scratch. On a technical side, Management and Slots can’t work with the native skill assignment system, so we will have to built a new one as well.
In addition, the Management element also has 4 smaller components.
[ADD] Equip a learned skills
[REMOVE] Unequip a skill
[SWAP] Replace an equipped skill with an unequipped one
[REORDER] Move an equipped skill to the first slot.
Those operations require items to be added and removed from our poll, and will give us two options.
Make the equipped skills poll a completely different set from the learned skills poll. Operations will move items from one poll to the other.
Make the equipped skills poll an assortment of the items from the learned skills poll. Operations will change the items within the equipped skills poll, but not the learned skills poll.
Here’s a visual example
Equipped |
Learned |
All |
|
|---|---|---|---|
Option 1 |
Sol, |
Axefaire |
Sol, |
Option 2 |
Sol, |
|
Sol, |
In a strict sense, option 1 is the most accurate. The only issue with it is that if we fail to properly handle any addition or removal operation, we may end up with duplicated skills or even delete it completely.
We will stick to the second one as it is easier to handle, less prone to bugs and also allows some extra customization options such as forced pair skills (it is a possibility but won’t be covered in this guide).
As such, the equipped skill poll will be a slice of the learned skill poll, and we will filter those skills out whenever we need to.
Events and Variables
For this guide we will have a total of 12 events. One of them being solely used as a conversion tool. It is possible to reduce them by half but that can make things significantly more confusing. Our events will have an underscore between words.
To save time, create all of the listed events in advance, preferably using the same names, as those will be the ones listed in the guide. Don’t forget to set their triggers as well. Those who have events listed as triggers have to be set as None. All of them use the Global level.
Event |
Type |
Trigger |
|---|---|---|
|
Collector |
level_start |
|
Assignment |
|
|
Assignment |
unit_level_up |
|
Conversion |
|
|
Interface |
|
|
Interface |
|
|
Interface |
|
|
Option |
|
|
Option |
|
Here’s a simple flowchart on how they will be connected.

As for our variables, most of them will be temporary data managers, and all of them are mandatory. All of our variables names will be written in upper case and have an underscore between words.
Variable |
Type |
Role |
|---|---|---|
* |
String/Tuple |
Holds all the skills |
|
Boolean, Integer, String, Nid |
Temporary variable of a given type. |
|
Integer |
Same as |
|
Nid |
Contains the Nid of the current |
|
Boolean |
Allows skill swap to be refreshed or terminated. |
|
Nid |
Selected skill from the list of equipped skills, that will undergo a skill swap operation. |
|
Nid |
Selected skill from the list of learned skills, that will undergo either add or swap/replace operations. |
|
String |
Yes/No option to swap an equipped skill with the last skill obtained when no equippable slot is available. |
|
Integer |
Defines the maximum number of equippable skill slots. |
|
nid |
Unit selected for skill swap. |
Our field list will be significantly shorter. They won’t use underscore and will start with a capital letter for each word split.
Field |
Assign on Editor |
Role |
|---|---|---|
|
No |
Checks if the unit went through initialization |
|
Yes |
Contains the corresponding index of the base class. Exclusive to pre-promoted units. |
|
No |
Tuple containing all the skills learned by the unit. |
|
No |
Tuple containing all the currently equipped skills by the unit. |
Step 0: Understanding how to build tuple with strings
Before we get into the guide itself, there’s a simple concept we need to understand as it will be a core aspect of our systems. Tuples are a type of array, which is a kind of variable that works as a item list. Instead of having a single value, it holds multiple entries that carry their individual values in itself, which is what exactly has slots work.
The event editor allows us to create tuples and retrieve tuple data but doesn’t allow us to use any of the tuple related operations directly. As such, we’re forced into converting them depending on what kind of operation we need to perform. We’ll build them from strings, convert them to tuple then later conver it strings, perform an operation through strings, and convert it back to tuple.
Out of all the operations we will perform, adding a new entry is the most essential. To do it through strings, we need to stack our elements in a single auxiliary string while respecting the tuple building syntax, like adding extra carts to a train.
game_var;EXAMPLE;""
game_var;EXAMPLE;"'First item',"
game_var;EXAMPLE;"{v:EXAMPLE}" + "'Second item,'"
game_var;EXAMPLE;"{v:EXAMPLE}" + "'Third item,'"
We will have to wipe our string before every stacking process to prevent leftover data and, in some cases, set it to a specific value that will be forced as the first item as well.
In this example, our string value should be:
'First item','Second Item','Third item',
It can then be converted into a tuple, by calling itself in brackets.
game_var;EXAMPLE;[{v:EXAMPLE}]
Every non-numeric item in it has to be contained in a pair of apostrophes followed by a comma. Otherwise it will interpret the commas as part a valid text element.
A tuple containing
'A','B','C'has 3 elements - [A], [B] and [C]A tuple containing
'A,B','C'has 2 elements - [A, B] and [C]
Step 1: Remove all skills from classes and units
As said before, the base system won’t work with the level of control that we want. In order to use a custom assignment system we need to wipe out all of the skills from the base system.

It is recommended to remove all of the skills, including Flying and Canto, if you plan to have class change and class promotion in your project.
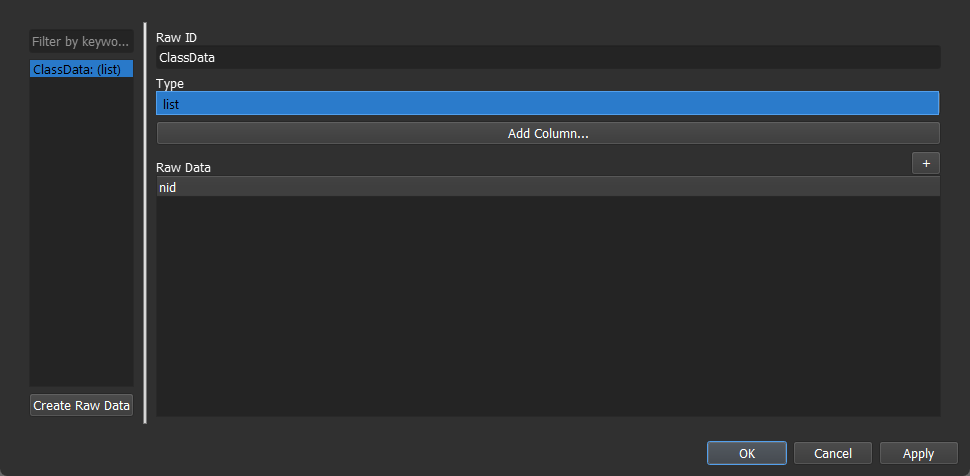
Step 2: Set the Raw Data table
The first step to create or new skill assignment system is to build a replacement for the data we deleted. We can do that by building a raw data list, named ClassData.
Our table will use the following columns.
nid |
class1 |
class2 |
skill1 |
skill2 |
|
|---|---|---|---|---|---|
data |
- |
- |
previous class A |
previous class B |
1st skill unlocked |
type |
class unique ID |
int |
int or blank |
skill nid |
skill nid |
For this guide, we will also add an index (starting at 0) column to make it easier to read and assign class codes. You can add more columns to fit your project needs, such as class3, skill4, etc.
Next, we need to fill the table with the data. Both class fields will be exclusively used by advanced classes, filling each with the base class it promotes from. If a class only has one promotion option, fill the class1 field and leave the other one empty.
Here’s a quick example.
index |
nid |
class1 |
class2 |
skill1 |
skill2 |
|---|---|---|---|---|---|
0 |
Lord |
DualStrike+ |
Charm |
||
1 |
Cavalier |
Discipline |
OutdoorFighter |
||
2 |
Knight |
Defense+2 |
UbdoorFighter |
||
3 |
GreatLord |
0 |
Aether |
RightfulKing |
|
4 |
GreatKnight |
1 |
2 |
Luna |
DualGuard+ |
5 |
General |
2 |
RallyDefense |
Pavise |
The end result should look similar to this:

This is a simplified table for the units that will be used in the guide, with many skills and classes being replaced by similar. You will run into errors if any data in it is missing or incorrect. Be sure to check and test all of it once the system is complete.
Just to reinforce an important point. Both class1 and class2 must contain only numerical values, as those are indexes that reference other classes in our table. For Eirika_Great_Lord, only class1 is used, and has the value 0 assigned, which is Eirika_Lord’s index. Meanwhile, Great_Knight has two possible classes to be promoted from, and 2 and 3 correspond to Cavalier and Knight respectively.

Skills also have to be assigned with proper nid’s, as shown in the image below.

This base concept can also be used to assign unit exclusive and/or secret skills, though the specifics won’t be covered in this guide.
Step 3: Build an Initializer event
Next. we will assign skills to our units. This is an issue on its own as it has to be applied to both allies, enemies and neutral units when they first appear in the game.
To do so, we will have to run an event that assign skills to our units at the start of each chapter. This process, known as initialization, only has to be done once per unit as running it multiple times will cause the unit to gain duplicate copies of skills whenever it moves to a new chapter.
Step 3.1: Create a level start manager
Our first is Unit_Fetcher and it has a really simple, get all the units and cast the initialization event on them. As said before, it has to happen at the start of every level - a Global with level_start trigger.
We’ll use a for-endf loop with a trigger_script inside, passing our unit data.
for;FETCHED_UNIT;[u for u in game.level.units]
    trigger_script;Global Unit_Initializer;{FETCHED_UNIT}
endf
This event is also the best place to set our skill slot size limiter. For this guide, we will use them to keep our code consistent.
game_var;SKILL_SWAP_CAP;5
Using a variable as a limiter also offers more flexibility when testing how many skills you want your game to have, and it can also be used in creative ways such as forcing certain units to have a different number of slots or even change the cap based on difficulty or as an optional toggle.
Once assembled, is should look like this:
game_var;SKILL_SWAP_CAP;5
for;FETCHED_UNIT;[u for u in game.level.units]
    trigger_script;Global Unit_Initializer;{FETCHED_UNIT}
endf
Step 3.2: Set the initialization condition
Next, we need to build the Unit_Initializer event that was called in the previous step. Since it can’t be run more than once, we need to start with the lock.
This time, we’ll set a simple if-end checking the field Initialized. All of our initialization code will be set inside it.
if;not unit.get_field('Initialized')
    #...
end
One interesting aspect of fields is that the engine will interpret fields that don’t exist as False, which saves us a lot of work from setting up every single class and unit.
To complete our lock mechanism, we’ll set that field to true. In this particular case, it will create the field as well.
#...
set_unit_field;{unit};Initialized;True
It is recommended to keep the field creation command at the very last line of our condition so it won’t block the event if a critical error occurs.
Once assembled, it will read like this:
if;not unit.get_field('Initialized')
    #...
    set_unit_field;{unit};Initialized;True
end
If the field doesn’t exist or has False as its value, create the field and/or set it to True.
We can go ahead and adding our three core collection variables that will contain the skill data. Since those three will be used extensively, they have to be set as empty strings to avoid any data leakage from previous runs.
game_var;LEARNED_SKILLS;""
game_var;EQUIPPED_SKILLS;""
game_var;AUX_SKILL;""
For now, we should have:
if;not unit.get_field('Initialized')
    game_var;LEARNED_SKILLS;""
    game_var;EQUIPPED_SKILLS;""
    game_var;AUX_SKILL;""
    #...
    set_unit_field;{unit};Initialized;True
end
Step 3.3: Retrieve the current class Index value
The next step is more complex, we need to get all the data from our unit class that was set to the ClassData table.
At first, we’ll stumble into three issues regarding the tools we have in our disposal.
There’s only one type of loop available
This loop doesn’t return an index number
We can only interact with a single field at time
The operation we want to do is index retrieval, which will allow us to access every single field from that index row. We can build a work around by adding a counter variable inside our loop, and eject right when we find a matching pair.
Our index retrieval mechanism requires an int to act as a counter itself and a bool to act as the lock, similar to what was done in the initialization. Again, as this will be used by every single unit, they have to be set at their minimum corresponding values.
#...
game_var;C_INDEX;0
game_var;AUX_BOL;False
For the loop, the only reliable parameter available in our unit is klass. Which is what we defined the ClassData table nid to be as well. We can add our counter to it as well, which can be done with the native command inc_game_var
for;FETCHED_CLASS;game.get_data('ClassData')
    #...
    inc_game_var;C_INDEX
    #...
endf
Note that the command game.get_data() is targeting a bidimensional array (table) and has multiple fields to pick from. That property will be used later. As the field wasn’t specified, the engine will seek the nid field.
At this point, the counter will only return the total number of rows in our table, so we need to set two locks one right next to each other. The first one will check if the unit klass matches an entry in our table, and then set the bool as True. The second one will be added around our counter as a negative, preventing it from happening while the bool is True.
#...
if;"{FETCHED_CLASS}" == unit.klass
    game_var;AUX_BOL;True
end
if;not {v:AUX_BOL}
    inc_game_var;C_INDEX
end
The engine will run the same order as the table follows. In the end, C_INDEX will have hold the number corresponding to that class position in the table. With the index value in hands, we can access all of the fields from the unit class.
Step 3.4: Retrieve the current class data
It’s time to expand the command used in the index retrieval loop. Other properties can be accessed with the following syntax:
game.get_data('RawData')[{index}].field
A quick example with class1 turns into:
game.get_data('ClassData')[{C_INDEX}].class1
We can finally retrieve the first data for our unit. Since we will work with lists, this data has to be stacked into a single place. This is where we’ll need LEARNED_SKILLS and tuple building.
game_var;AUX_SKILL;game.get_data('ClassData')[{v:C_INDEX}].skill1
game_var;LEARNED_SKILLS;"{v:LEARNED_SKILLS}" + "'{v:AUX_SKILL}',"
This covers the basics but classes have predefined skill unlock levels. For awakening, they were set as:
Skill 1 level |
Skill 2 level |
|
|---|---|---|
Base |
1 |
10 |
Advancement |
5 |
15 |
Let’s take our current class as a non-promoted. The first skill will always be available so we just need to worry about restricting the second one. A simple if-end would do.
if;unit.level >= 10
    game_var;AUX_SKILL;game.get_data('ClassData')[{v:C_INDEX}].skill2
    game_var;LEARNED_SKILLS;"{v:LEARNED_SKILLS}" + "'{v:AUX_SKILL}',"
end
Be sure that he condition is set as greater or equal (>=).
That’s good enough for this tier but we need to cover the advancement as well. One option would be to add individual conditions for each one of them but we can use a more elegant solution by checking a common pattern. Promoted classes level milestones are delayed by 5 levels when compared to the base classes.
It is possible to create a formula for it if we use the class tier value. Let’s store that value in AUX_INT. We’ll retrieve it from the internal database, within the class data.
To access it, we need to use the following syntax:
{e:DB.classes.get('class nid').tier}
Here, class nid will be replaced by {e:unit.klass}.
game_var;AUX_INT;{e:DB.classes.get('{e:unit.klass}').tier}
This command lines is using an evaluation inside another evaluation. This is required as the our data is being promptly converted into text, and we need it to be retrieved first, otherwise it will seek the class unit.klass nid.
For the formulas, they’re really simple. When the tier value increases by 1 the level requirement increases by 5. Multiply those and add a base number to get the corresponding values.
First skill:
5 * {tier} - 5
Second skill:
5 * {tier} + 5
While the first skill level isn’t totally accurate, the condition for it will still be greater or equal. On practice, it won’t make any difference.
Once we add the formula, it should look like this:
if;unit.level >= 5 * {v:AUX_INT} - 5
    game_var;AUX_SKILL;game.get_data('ClassData')[{v:C_INDEX}].skill2
    game_var;LEARNED_SKILLS;"{v:LEARNED_SKILLS}" + "'{v:AUX_SKILL}',"
end
if;unit.level >= 5 * {v:AUX_INT} + 5
    game_var;AUX_SKILL;game.get_data('ClassData')[{v:C_INDEX}].skill2
    game_var;LEARNED_SKILLS;"{v:LEARNED_SKILLS}" + "'{v:AUX_SKILL}',"
end
As a matter of preference and processing optimization, we’ll move the second condition inside the first one. The whole block should look like this:
game_var;AUX_INT;{e:DB.classes.get('{e:unit.klass}').tier}
if;unit.level >= 5 * {v:AUX_INT} - 5
    game_var;AUX_SKILL;game.get_data('ClassData')[{v:C_INDEX}].skill1
    game_var;LEARNED_SKILLS;"{v:LEARNED_SKILLS}" + "'{v:AUX_SKILL}',"
    if;unit.level >= 5 * {v:AUX_INT} + 5
        game_var;AUX_SKILL;game.get_data('ClassData')[{v:C_INDEX}].skill2
        game_var;LEARNED_SKILLS;"{v:LEARNED_SKILL}" + "'{v:AUX_SKILL}',"
    end
end
Step 3.4.1: Add self contained class exceptions
Here is where we run into an annoying issue that isn’t exclusive to Fire Emblem: Awakening but may not be part of your project.
There are a few classes that follow a different set of rules and they can’t work with a standard formula. The first skill is granted at the base class level but the second one is granted at the advanced level, 1 and 15 respectively.
The most effective way to address it is by expanding our second skill condition, as those classes are categorized as unpromoted, but it is easier to handle it by adding an additional conditional branch instead.
Our base condition for those classes would be:
unit.klass in ('Bride', 'Dancer', 'Dread Fighter', 'Manakete', 'Taguel', 'Villager')
As this restriction is exclusive the the group second skill, the level can be set manually.
unit.klass in ('Bride', 'Dancer', 'Dread Fighter', 'Manakete', 'Taguel', 'Villager') and unit.level >= 15
Every single exception has to be checked first. We should have something like:
if;unit.level >= 5 * {v:AUX_INT} - 5
    game_var;AUX_SKILL;game.get_data('ClassData')[{v:C_INDEX}].skill1
    game_var;LEARNED_SKILLS;"{v:LEARNED_SKILLS}" + "'{v:AUX_SKILL}',"
    if;unit.klass in ('Bride', 'Dancer', 'Dread Fighter', 'Manakete', 'Taguel', 'Villager') and unit.level >= 15
        game_var;AUX_SKILL;game.get_data('ClassData')[{v:C_INDEX}].skill2
        game_var;LEARNED_SKILLS;"{v:LEARNED_SKILL}" + "'{v:AUX_SKILL}',"
    elif;unit.level >= 5 * {v:AUX_INT} + 5
        game_var;AUX_SKILL;game.get_data('ClassData')[{v:C_INDEX}].skill2
        game_var;LEARNED_SKILLS;"{v:LEARNED_SKILL}" + "'{v:AUX_SKILL}',"
    end
end
Step 3.5: Retrieve the previous class data
Here’s where we take the first visual compromise. In Fire Emblem Awakening, pre-promoted units skills will be listed as if the unit was leveled by the player. In short, base class skills appear first.
For now, we will ignore that aspect and focus on retrieving data from a second class.
All of the key units have their base classes pre-determined, and that information can only be set manually. Fortunately the editor can save us a lot of work.
First, we go back to our raw data table and get the corresponding index. We will use Seth as our example unit, as a base Great Knight promoted from Knight.

Great Knight index is 9, promoted from indexes 2 and 3. The first one is Cavalier and the Second one is Knight. For this exercise, we’ll pretend he was promoted from Knight.
In the unit editor, we’ll add the field BaseClass and set its value to Knight’s index, 3.

Back to the event editor, we need to add a verifier for the tier and field.
game_var;AUX_INT;{e:DB.classes.get('{e:unit.klass}').tier}
if;{v:AUX_INT} >= 2
    if; unit.get_field('BaseClass')
        game_var;AUX_INT;unit.get_field('BaseClass')
    else
        #...
    end
    #...
end
At this point you may see a critical issue regarding this approach. It will surely work as long as every one of our key units have the field defined with a valid value. Which is the same as saying, if the unit is a generic or a key unit that didn’t received such field, it won’t get base class skills. A valid option if intended, but we should have some sort of backup if not.
Our options would be
Define every map encounters through events
Use class1 as the default when a class isn’t specified
Not assign base class skills
Assign a class at random
At this point, you should be able to do 1 to 3 on your own by tinkering with the previous steps. We’ll focus on the 4th then.
The easiest approach is by adding all of our possible class options to a tuple and pick one of them at random. This new code will be deployed inside the else branch.
Starting with a refresh.
#...
game_var;AUX_STR;""
And follow up with some stacking.
if;game.get_data('ClassData')[{v:C_INDEX}].class1
    game_var;AUX_STR;"{v:AUX_STR}" + game.get_data('ClassData')[{v:C_INDEX}].class1 + ","
end
As all entries in the tuple are numbers, they won’t require the use of apostrophes.
We want to add that conditional statement to skip any potential empty cell, as they can mess up our poll. This block can copied and pasted for every single class slot the project uses, using the corresponding column name (class1, class2, class3, …).
Next, we build the tuple, pick the random number based on our tuple size and retrieve the value using the sorted index.
game_var;AUX_STR;[{v:AUX_STR}]
game_var;AUX_INT;game.get_random(0,len({v:AUX_STR})-1)
game_var;AUX_INT;{v:AUX_STR}[{v:AUX_INT}]
The len() method will give use the last index number +1, and that extra increment has to be corrected.
Our random picker should look something like this:
if;game.get_data('ClassData')[{v:C_INDEX}].class1
    game_var;AUX_STR;"{v:AUX_STR}" + game.get_data('ClassData')[{v:C_INDEX}].class1 + ","
end
if;game.get_data('ClassData')[{v:C_INDEX}].class2
    game_var;AUX_STR;"{v:AUX_STR}" + game.get_data('ClassData')[{v:C_INDEX}].class2 + ","
end
game_var;AUX_STR;[{v:AUX_STR}]
game_var;AUX_INT;game.get_random(0,len({v:AUX_STR})-1)
game_var;AUX_INT;{v:AUX_STR}[{v:AUX_INT}]
Assembling it with the previous branch, we get the following:
game_var;AUX_INT;{e:DB.classes.get('{e:unit.klass}').tier}
if;{v:AUX_INT} >= 2
    if; unit.get_field('BaseClass')
        game_var;AUX_INT;unit.get_field('BaseClass')
    else
        if;game.get_data('ClassData')[{v:C_INDEX}].class1
            game_var;AUX_STR;"{v:AUX_STR}" + game.get_data('ClassData')[{v:C_INDEX}].class1 + ","
        end
        if;game.get_data('ClassData')[{v:C_INDEX}].class2
            game_var;AUX_STR;"{v:AUX_STR}" + game.get_data('ClassData')[{v:C_INDEX}].class2 + ","
        end
        game_var;AUX_STR;[{v:AUX_STR}]
        game_var;AUX_INT;game.get_random(0,len({v:AUX_STR})-1)
        game_var;AUX_INT;{v:AUX_STR}[{v:AUX_INT}]
    end
    #...
end
That last empty space can be filled with the skill retrieval. Same syntax as the previous step, but this time we won’t need any conditions.
#...
game_var;AUX_SKILL;game.get_data('ClassData')[{v:AUX_INT}].skill1
game_var;LEARNED_SKILLS;"{v:LEARNED_SKILLS}" + "'{v:AUX_SKILL}',"
game_var;AUX_SKILL;game.get_data('ClassData')[{v:AUX_INT}].skill2
game_var;LEARNED_SKILLS;"{v:LEARNED_SKILLS}" + "'{v:AUX_SKILL}',"
At last, our code should look like this:
game_var;AUX_INT;{e:DB.classes.get('{e:unit.klass}').tier}
if;{v:AUX_INT} >= 2
    if;unit.get_field('BaseClass')
        game_var;AUX_INT;unit.get_field('BaseClass')
    else
        game_var;AUX_STR;""
        if;game.get_data('ClassData')[{v:C_INDEX}].class1
            game_var;AUX_STR;"{v:AUX_STR}" + game.get_data('ClassData')[{v:C_INDEX}].class1 + ","
        end
        if;game.get_data('ClassData')[{v:C_INDEX}].class2
            game_var;AUX_STR;"{v:AUX_STR}" + game.get_data('ClassData')[{v:C_INDEX}].class2 + ","
        end

        game_var;AUX_STR;[{v:AUX_STR}]
        game_var;AUX_INT;game.get_random(0,len({v:AUX_STR})-1)
        game_var;AUX_INT;{v:AUX_STR}[{v:AUX_INT}]
    end
    game_var;AUX_SKILL;game.get_data('ClassData')[{v:AUX_INT}].skill1
    game_var;LEARNED_SKILLS;"{v:LEARNED_SKILLS}" + "'{v:AUX_SKILL}',"
    game_var;AUX_SKILL;game.get_data('ClassData')[{v:AUX_INT}].skill2
    game_var;LEARNED_SKILLS;"{v:LEARNED_SKILLS}" + "'{v:AUX_SKILL}',"
end
This block only address for single promotion trees. Extensive class tree will require more conditions, events and/or loops.
Bear in mind that this chunk of code has to come first to keep the skill display order as a natural progression. The order should be the following:
if;not unit.get_field('Initialized')
    game_var;LEARNED_SKILLS;""
    game_var;EQUIPPED_SKILLS;""

    #<3.3>
    #<3.5>
    #<3.4>

    #...

    set_unit_field;{unit};Initialized;True
end
The three number codes within tags are replacing the final code of their respective steps. This indicator will be used on later steps as well.
Step 3.6: Set both skill tuples
Next in the line is tuple building. Nothing new in here, except that we’ll also set a value to EQUIPPED_SKILLS. In this particular structure, it should be impossible for an unit to be deployed with more than 4 equipped skills unlocked. That is the sole reason we ignored EQUIPPED_SKILLS until now. You may need to do a couple of adjustments if your game uses fewer slots or more skills per class.
#...
game_var;EQUIPPED_SKILLS;"{v:LEARNED_SKILLS}"
game_var;EQUIPPED_SKILLS;[{v:EQUIPPED_SKILLS}]
game_var;LEARNED_SKILLS;[{v:LEARNED_SKILLS}]
The two first lines could be combined for optimization but we want to have more room for test control, such as giving specific units or classes extra skills. This is one of many good reasons to add a hard block to our EQUIPPED_SKILLS poll.
As a tuple we can use the len() to count how many indexes our tuple has and the [start index:end index] structure to trim it based on the indexes.
if;len({v:EQUIPPED_SKILLS}) > {v:SKILL_SWAP_CAP}
    game_var;EQUIPPED_SKILLS;{v:EQUIPPED_SKILLS}[0:{v:SKILL_SWAP_CAP}]
end
This will check if our tuple is above our limit and cut everything added past our boundary.
At last, we pass the tuple information to our fields.
set_unit_field;{unit};EquippedSkills;{v:EQUIPPED_SKILLS}
set_unit_field;{unit};LearnedSkills;sorted({v:LEARNED_SKILLS})
The sorted() method will order all the tuple elements alphabetically. A small quality of life aspect for browsing.
It should look like this:
game_var;EQUIPPED_SKILLS;"{v:LEARNED_SKILLS}"
game_var;EQUIPPED_SKILLS;[{v:EQUIPPED_SKILLS}]
game_var;LEARNED_SKILLS;[{v:LEARNED_SKILLS}]

if;len({v:EQUIPPED_SKILLS}) > {v:SKILL_SWAP_CAP}
    game_var;EQUIPPED_SKILLS;{v:EQUIPPED_SKILLS}[0:{v:SKILL_SWAP_CAP}]
end

set_unit_field;{unit};EquippedSkills;{v:EQUIPPED_SKILLS}
set_unit_field;{unit};LearnedSkills;sorted({v:LEARNED_SKILLS})
Step 3.7: Assign the equipped skills
Up to this point we only managed the data. If we were to play a test chapter, none of the units would have any skills assigned.
We can run a simple loop to add the EQUIPPED_SKILLS.
for;FETCHED_SKILL;{v:EQUIPPED_SKILLS}
    give_skill;{unit};{FETCHED_SKILL};no_banner
endf
Complete script
if;not unit.get_field('Initialized')
    game_var;LEARNED_SKILLS;""
    game_var;EQUIPPED_SKILLS;""
    game_var;AUX_SKILL;""
    game_var;C_INDEX;0
    game_var;AUX_BOL;False

    #<3.3>
    for;FETCHED_CLASS;game.get_data('ClassData')
        if;"{FETCHED_CLASS}" == unit.klass
            game_var;AUX_BOL;True
        end
        if;not {v:AUX_BOL}
            inc_game_var;C_INDEX
        end
    endf

    #<3.5>
    game_var;AUX_INT;{e:DB.classes.get('{e:unit.klass}').tier}
    if;{v:AUX_INT} >= 2
        if;unit.get_field('BaseClass')
            game_var;AUX_INT;unit.get_field('BaseClass')
        else
            game_var;AUX_STR;""
            if;game.get_data('ClassData')[{v:C_INDEX}].class1
                game_var;AUX_STR;"{v:AUX_STR}" + game.get_data('ClassData')[{v:C_INDEX}].class1 + ","
            end
            if;game.get_data('ClassData')[{v:C_INDEX}].class2
                game_var;AUX_STR;"{v:AUX_STR}" + game.get_data('ClassData')[{v:C_INDEX}].class2 + ","
            end
            game_var;AUX_STR;[{v:AUX_STR}]
            game_var;AUX_INT;game.get_random(0,len({v:AUX_STR})-1)
            game_var;AUX_INT;{v:AUX_STR}[{v:AUX_INT}]
        end
        game_var;AUX_SKILL;game.get_data('ClassData')[{v:AUX_INT}].skill1
        game_var;LEARNED_SKILLS;"{v:LEARNED_SKILLS}" + "'{v:AUX_SKILL}',"
        game_var;AUX_SKILL;game.get_data('ClassData')[{v:AUX_INT}].skill2
        game_var;LEARNED_SKILLS;"{v:LEARNED_SKILLS}" + "'{v:AUX_SKILL}',"
    end

    #<3.4>
    game_var;AUX_INT;game.get_data('ClassData')
    if;unit.level >= 5 * {v:AUX_INT} - 5
        game_var;AUX_SKILL;game.get_data('ClassData')[{v:C_INDEX}].skill1
        game_var;LEARNED_SKILLS;"{v:LEARNED_SKILLS}" + "'{v:AUX_SKILL}',"
        if;unit.klass in ('Bride', 'Dancer', 'Dread Fighter', 'Manakete', 'Taguel', 'Villager') and unit.level >= 15
            game_var;AUX_SKILL;game.get_data('ClassData')[{v:C_INDEX}].skill2
            game_var;LEARNED_SKILLS;"{v:LEARNED_SKILL}" + "'{v:AUX_SKILL}',"
        elif;unit.level >= 5 * {v:AUX_INT} + 5
            game_var;AUX_SKILL;game.get_data('ClassData')[{v:C_INDEX}].skill2
            game_var;LEARNED_SKILLS;"{v:LEARNED_SKILL}" + "'{v:AUX_SKILL}',"
        end
    end

    #<3.6>
    game_var;EQUIPPED_SKILLS;"{v:LEARNED_SKILLS}"
    game_var;EQUIPPED_SKILLS;[{v:EQUIPPED_SKILLS}]
    game_var;LEARNED_SKILLS;[{v:LEARNED_SKILLS}]
    if;len({v:EQUIPPED_SKILLS}) > 5
        game_var;EQUIPPED_SKILLS;{v:EQUIPPED_SKILLS}[0:5]
    end
    set_unit_field;{unit};EquippedSkills;{v:EQUIPPED_SKILLS}
    set_unit_field;{unit};LearnedSkills;sorted({v:LEARNED_SKILLS})

    #<3.7>
    for;FETCHED_SKILL;{v:EQUIPPED_SKILLS}
        give_skill;{unit};{FETCHED_SKILL};no_banner
    endf

    set_unit_field;{unit};Initialized;True
end
Step 3.7+: Add more learned skills
To add more skills we just need to concatenate more items to our string before the tuple conversion done in 3.6.
For this example we will be using Seth as our unit and also Trickster as a class. Our skills will be Luna and Sol, but we won’t add the the latter to the equipped skills poll.
if;unit.nid == 'Seth' or unit.klass == 'Trickster'
    game_var;AUX_SKILL;"Luna"
    game_var;EQUIPPED_SKILLS;"{v:EQUIPPED_SKILLS}" + "'{v:AUX_SKILL}',"
    game_var;AUX_SKILL;"{v:AUX_SKILL}" + "Sol"
    game_var;LEARNED_SKILLS;"{v:LEARNED_SKILLS}" + "{v:AUX_SKILL},"
end
There’s also the option to only add skills to the equipped poll, however these skills won’t be restored once removed or swapped.
You may run a test to check if the extra skill was applied correctly. Of course, you won’t be able to see Sol in it until we build the UI.
Step 4: Build the skill unlock event
Initialization only takes care of the base setup, we still need to allow our units to gain skills upon leveling or class change. Fortunately, both can be done in the same event without any workaround.
It’s time to build the Check_Skill_Unlock event. On a conceptual level, unlocking skills is a fragment of the whole process of assigning skills based on the unit level. A lot of the structures we used to build the initialization will be reused in here.
Step 4.1: Find the ClassData corresponding index
Once again, the first step is to get the class index, just as we did in 3.3, along the AUX_SKILL reset. This time, we will follow it up by retrieving the class tier right away.
game_var;AUX_SKILL;""
game_var;C_INDEX;0
game_var;AUX_BOL;False
for;FETCHED_CLASS;game.get_data('ClassData')
    if;"{FETCHED_CLASS}" == unit.klass
        game_var;AUX_BOL;True
    end
    if;not {v:AUX_BOL}
        inc_game_var;C_INDEX
    end
endf
game_var;AUX_INT;{e:DB.classes.get('{e:unit.klass}').tier}
Step 4.2: Retrieve the skill based on the unit level
Next, we have have to check if the unit has reached an unlock level and retrieve the skill. Again, we will take a chunk of the code used in 3.4.
Here we have a crucial distinction to that variant. Our conditions have to use equal (==) instead of greater or equal (>=), otherwise we will be flooded by duplicates.
Additionally, we’ll have to use the max() command for our first skill. This command returns the highest value of two numbers, we set one of them as 1 and it will cover for all base classes.
if;unit.level == max (1, 5 * {v:AUX_INT} - 5)
    game_var;AUX_SKILL;game.get_data('ClassData')[{v:C_INDEX}].skill1
elif;unit.level = 5 * {v:AUX_INT} + 5
    game_var;AUX_SKILL;game.get_data('ClassData')[{v:C_INDEX}].skill2
end
Following up, we need to be sure that our skill haven’t been learned before moving on, which may happen depending on how the game is structured. The condition is simple.
if;'{v:AUX_SKILL}' not in unit.get_field('LearnedSkills')
    #...
end
The only issue with this condition is that the engine won’t interpret the empty value as a skill that doesn’t exist in the tuple, so we need to correct that by checking if {v:AUX_SKILL} has a value. Just patch the condition with {v:AUX_SKILL} and to fix it.
if;{v:AUX_SKILL} and '{v:AUX_SKILL}' not in unit.get_field('LearnedSkills')
    #...
end
All of our following code will be added inside that if-end statement.
Step 4.2.1: Add self contained class exceptions
Same as 3.4.1, adapt the code to allow our exceptions.
if;unit.level == max (1, 5 * {v:AUX_INT} - 5)
    game_var;AUX_SKILL;game.get_data('ClassData')[{v:C_INDEX}].skill1
elif;unit.klass in ('Bride', 'Dancer', 'Dread Fighter', 'Manakete', 'Taguel', 'Villager') and unit.level == 15
    game_var;AUX_SKILL;game.get_data('ClassData')[{v:C_INDEX}].skill2
elif;unit.level == 5 * {v:AUX_INT} + 5
    game_var;AUX_SKILL;game.get_data('ClassData')[{v:C_INDEX}].skill2
end
Step 4.3: Add the skill to the LearnedSkill tuple
It’s time to put the explanation from step 0 into practice. To do so, we have to rely on ','.join("Expression"), a method that converts arrays into strings based on the input expression.
game_var;LEARNED_SKILLS;','.join(s for s in unit.get_field('LearnedSkills')) + ",'{v:AUX_SKILL}'"
One issue with ','.join() is that it will return a direct string for each entry. If our tuple had 'Sol', 'Luna', 'Astra' the output would be Sol, Luna, Astra. While that is handy, our string will become a tuple again once we add the extra item and we need it to be properly formatted. Fortunately, this can be easily addressed by adding the apostrophes around s.
game_var;LEARNED_SKILLS;','.join("'" + s + "'" for s in unit.get_field('LearnedSkills')) + ",'{v:AUX_SKILL}'"
Now that the entry was added, we convert it back.
set_unit_field;{unit};LearnedSkills;sorted([{v:LEARNED_SKILLS}])
Since that string has no use past this point, it can be added along the field update command.
Step 4.4: Auto equip the new skill
At last, we have to check if we to auto equip our skill if the unit has any vacant slot. We will adjust the code used in 3.6, but this time using the field directly.
if;len(unit.get_field('EquippedSkills')) < {v:SKILL_SWAP_CAP}
    #...
else
    #...
end
Our previous block of code will be added inside the True output branch, and we will follow it up by assigning the skill to the unit.
#...
give_skill;{unit};{v:AUX_SKILL};
Of course, our EquippedSkills field has to be updated as well, just like in 4.3.
game_var;EQUIPPED_SKILLS;','.join("'" + s + "'" for s in unit.get_field('EquippedSkills')) + ",'{v:AUX_SKILL}'"
set_unit_field;{unit};EquippedSkills;[{v:EQUIPPED_SKILLS}]
For the False side, we want to display an message and a menu for the player to pick if it wants to equip the new skill or not.
alert;<blue>{e:unit.nid}</> learned <blue>{e:DB.skills.get('{v:AUX_SKILL}').name}</>;;{v:AUX_SKILL}
The <blue></> will format the message to appear more similar to the default skill unlock message.
Next, we add our first menu using the choice command, it will pass the options Yes and No.
choice;EQUIP_NEW_SKILL;Equip the skill?;Yes,No
To access the player choice, we have to build comparing the retrieved value to the used in our target option.
Here’s the syntax:
if;'{choice variable}' == 'option text'
    #...
end
Which turns into:
if;'{v:EQUIP_NEW_SKILL}' == 'Yes'
    #...
end
We can add a call for the event, though it will be one of the last things built in this guide.
if;'{v:EQUIP_NEW_SKILL}' == 'Yes'
    trigger_script;Skill_Swap_Level_Up (Global Skill_Swap_Level_Up);{unit}
end
Our assembled code should look like this:
if;len(unit.get_field('EquippedSkills')) < {v:SKILL_SWAP_CAP}
    give_skill;{unit};{v:AUX_SKILL};
    game_var;EQUIPPED_SKILLS;','.join("'" + s + "'" for s in unit.get_field('EquippedSkills')) + ",'{v:AUX_SKILL}'"
    set_unit_field;{unit};EquippedSkills;sorted([{v:EQUIPPED_SKILLS}])
else
    alert;<blue>{e:unit.nid}</> learned <blue>{e:DB.skills.get('{v:AUX_SKILL}').name}</>;;{v:AUX_SKILL}
    choice;EQUIP_NEW_SKILL;Equip the skill?;Yes,No
    if;'{v:EQUIP_NEW_SKILL}' == 'Yes'
        trigger_script;Skill_Swap_Level_Up (Global Skill_Swap_Level_Up);{unit}
    end
end
Complete script
game_var;C_INDEX;0
game_var;AUX_BOL;False
game_var;AUX_SKILL;""

#<4.1>
for;FETCHED_CLASS;game.get_data('ClassData')
    if;"{FETCHED_CLASS}" == unit.klass
        game_var;AUX_BOL;True
    end
    if;not {v:AUX_BOL}
        inc_game_var;C_INDEX
    end
endf
game_var;AUX_INT;{e:DB.classes.get('{e:unit.klass}').tier}

#<4.2>
if;unit.level == max (1, 5 * {v:AUX_INT} - 5)
    game_var;AUX_SKILL;game.get_data('ClassData')[{v:C_INDEX}].skill1
elif;unit.klass in ('Bride', 'Dancer', 'Dread Fighter', 'Manakete', 'Taguel', 'Villager') and unit.level == 15
    game_var;AUX_SKILL;game.get_data('ClassData')[{v:C_INDEX}].skill2
elif;unit.level == 5 * {v:AUX_INT} + 5
    game_var;AUX_SKILL;game.get_data('ClassData')[{v:C_INDEX}].skill2
end

if;'{v:AUX_SKILL}' and '{v:AUX_SKILL}' not in unit.get_field('LearnedSkills')

    #<4.3>
    game_var;LEARNED_SKILLS;','.join("'" + s + "'" for s in unit.get_field('LearnedSkills')) + ",'{v:AUX_SKILL}'"
    set_unit_field;{unit};LearnedSkills;sorted([{v:LEARNED_SKILLS}])

    #<4.4>
    if;len(unit.get_field('EquippedSkills')) < {v:SKILL_SWAP_CAP}
        game_var;EQUIPPED_SKILLS;','.join("'" + s + "'" for s in unit.get_field('EquippedSkills')) + ",'{v:AUX_SKILL}'"
        set_unit_field;{unit};EquippedSkills;[{v:EQUIPPED_SKILLS}]
        give_skill;{unit};{v:AUX_SKILL};
    else
        alert_skill;<blue>{e:unit.nid}</> learned <blue>{e:DB.skills.get('{v:AUX_SKILL}').name}</>;;{v:AUX_SKILL}
        choice;EQUIP_NEW_SKILL;;Yes,No
        if;'{v:EQUIP_NEW_SKILL}' == 'Yes'
            trigger_script;Skill_Swap_Level_Up (Global Skill_Swap_Level_Up);{unit}
        end
    end

end
Step 5: Create the Skill Swap base
The backstage is complete, onto the UI. This time, it will be the Skill_Swap_Setup event.
Step 5.1: Create Slot skills
But before that, there’s also an extra requirement that haven’t been addressed yet and it’s mostly a mix of technicality with some visual benefits.
First, we have to understand a particular limitation regarding the engine:
In order for skills to be displayed in a list with their icon, the list can’t have anything that isn’t a skill
If an unit has vacant slots, it needs a text to inform it in the list.
If all of the learned skills are already equipped, the learned skill needs a text to inform it in the list.
This limitation applies to every single icon based list. Fortunately, it can be done with a simple workaround using two skills with no components nor icons.
The first skill will be named Add_New_Skill, used for the equipped skills group, and the second one will be named Empty_Skill_List, only to be used when all the learned skills are equipped.

You may dismiss the <grey></> tag if you want to, but it great visual indicator that our dummy skills aren’t real skills.
Step 5.2: Process the equipped skills group
Back to Skill_Swap_Setup. Our equipped skill list has to be displayed in a menu and doing so requires two key processes. The first is a conversion from tuple to string, as the choice only accepts the latter, and the second is the addition of the dummy skill whenever the unit presents a vacant slot.
Again, we’ll rely on ','.join().
game_var;EQUIPPED_SKILLS;','.join([s for s in unit.get_field('EquippedSkills')])
For the vacant slot check, we have two distinct scenarios, one with no skills equipped at all and the other with skills equipped and a vacant slot.
Let’s start by checking the size of our EquippedSkills field. As a tuple, we can use len() again.
if;len(unit.get_field('EquippedSkills')) == 0
    #...
elif;len(unit.get_field('EquippedSkills')) < {v:SKILL_SWAP_CAP}
    #...
end
As redundant as this may look, it is vital to split these conditions when handing choice options.
Going for the bottom condition first. We want our option list to be extended with our dummy skill.
#...
game_var;EQUIPPED_SKILLS;"{v:EQUIPPED_SKILLS},Add_New_Skill"
Meanwhile, the empty list will receive the dummy skill and nothing else.
#...
game_var;EQUIPPED_SKILLS;"Add_New_Skill"
Let’s run two quick tests to see the problem at hand. One with Luna, Sol as our skills, and the second one with no skill at all, both taking the < {v:SKILL_SWAP_CAP} approach.
Tuple |
Number of |
Output |
Corrected |
|---|---|---|---|
‘Luna’, |
2 |
Luna, |
Luna, |
0 |
, |
The engine can’t find a match for that case and will return an invalid skill, which is why we need to enforce a hard reset.
For the learned skill poll we’ll also need a counter in case the list is empty, but the idea is different. Since both polls should overlap, what we need to know is if the LearnedSkill poll is larger than the EquippedSkill poll, using our dummy skill only when it isn’t.
if;len(unit.get_field('LearnedSkills')) > len(unit.get_field('EquippedSkills'))
    #...
else
    game_var;LEARNED_SKILLS;"Empty_Skill_List"
end
To exclude the equipped skills, we can add a single condition into the ','.join() method.
#...
game_var;LEARNED_SKILLS;','.join([s for s in unit.get_field('LearnedSkills') if s not in unit.get_field('EquippedSkills')])
This will force the engine to compare if any entry exists in both tuples, only adding those exclusive to the LearnedSkills poll.
Once assembled, it should look like this:
game_var;EQUIPPED_SKILLS;','.join([s for s in unit.get_field('EquippedSkills')])
if;len(unit.get_field('EquippedSkills')) == 0
    game_var;EQUIPPED_SKILLS;"Add_New_Skill"
elif;len(unit.get_field('EquippedSkills')) < {v:SKILL_SWAP_CAP}
    game_var;EQUIPPED_SKILLS;"{v:EQUIPPED_SKILLS},Add_New_Skill"
end

if;len(unit.get_field('LearnedSkills')) > len(unit.get_field('EquippedSkills'))
    game_var;LEARNED_SKILLS;','.join([s for s in unit.get_field('LearnedSkills') if s not in unit.get_field('EquippedSkills')])
else
    game_var;LEARNED_SKILLS;"Empty_Skill_List"
end
Step 5.4: Add a refresh mechanism
Another particular issue with skill swap is that our lists are both persistent and dynamic. While we have a flag for the first, we don’t have any tool that allows our choice list to be updated while active. The only resource we have to update those lists is by resetting it once it finishes any operation request.
Of course, this can lead to another issue, getting stuck in an infinite looping. We can avoid that by adding a condition to our refresh mechanism.
At the very top of the event script, we have to add our variable and its value.
game_var;EXIT_SKILL_SWAP;True
And at the very end, the condition with the opposite value.
if;not {v:EXIT_SKILL_SWAP}
#...
end
As for the syntax, we’ll just use trigger_script, but referencing the own event.
#...
trigger_script;Skill_Swap_Setup (Global Skill_Swap_Setup)
As it is, the condition will be ignored every time. We will address that at the start of Skill_Swap_Setup.
Complete script
game_var;EXIT_SKILL_SWAP;True
#<5.2>
game_var;EQUIPPED_SKILLS;','.join([s for s in unit.get_field('EquippedSkills')])
if;len(unit.get_field('EquippedSkills')) == 0
game_var;EQUIPPED_SKILLS;"Add_New_Skill"
elif;len(unit.get_field('EquippedSkills')) < {v:SKILL_SWAP_CAP}
game_var;EQUIPPED_SKILLS;"{v:EQUIPPED_SKILLS},Add_New_Skill"
end
if;len(unit.get_field('LearnedSkills')) > len(unit.get_field('EquippedSkills'))
game_var;LEARNED_SKILLS;','.join([s for s in unit.get_field('LearnedSkills') if s not in unit.get_field('EquippedSkills')])
else
game_var;LEARNED_SKILLS;"Empty_Skill_List"
end
#<5.3>
game_var;EXIT_SKILL_SWAP;True
game_var;EQUIPPED_SKILLS;','.join([s for s in unit.get_field('EquippedSkills')])
if;len(unit.get_field('EquippedSkills')) == 0
    game_var;EQUIPPED_SKILLS;"Add_New_Skill"
elif;len(unit.get_field('EquippedSkills')) < {v:SKILL_SWAP_CAP}
    game_var;EQUIPPED_SKILLS;"{v:EQUIPPED_SKILLS},Add_New_Skill"
end

if;len(unit.get_field('LearnedSkills')) > len(unit.get_field('EquippedSkills'))
    game_var;LEARNED_SKILLS;','.join([s for s in unit.get_field('LearnedSkills') if s not in unit.get_field('EquippedSkills')])
else
    game_var;LEARNED_SKILLS;"Empty_Skill_List"
end

table;UNIT_RIGHT_SKILLS;{v:LEARNED_SKILLS};Learned Skills;{v:SKILL_SWAP_CAP},1;100;top_right;menu_bg_base (menu_bg_base);type_skill
choice;UNIT_EQUIPPED_SKILLS;Equipped Skills;{v:EQUIPPED_SKILLS};100;vert;top_left;;Skill_Swap_Operations (Global Skill_Swap_Operations);type_skill;{v:SKILL_SWAP_CAP},1;backable
rmtable;UNIT_RIGHT_SKILLS
#<5.4>
if;not {v:EXIT_SKILL_SWAP}
trigger_script;Skill_Swap_Setup (Global Skill_Swap_Setup)
end
Step 7: Build the Skill Swap Operations event
Now that our base UI elements are either set or implemented, we have to build Skill_Swap_Operations. This event will act as a HUB between the previous menu and the real operations performed in the system. Just as said in 5.4, we need to set the refresh control variable to its opposite value.
game_var;EXIT_SKILL_SWAP;False
Here’s how the trick work, as long as Skill_Swap_Operations event happens, the Skill_Swap_Setup event will be restarted.
Except for Cancel, all of our operations are dependent on context, and will be available at the same time. We need to set an order for them and cover all the scenarios where each option is eligible.
Option |
Equipped |
Learned |
|---|---|---|
Add |
Dummy |
Not zero |
Swap |
Not dummy |
Not zero |
Remove |
Not dummy |
Any |
Reorder |
Last non-dummy skill |
Any |
One important thing to have in mind is that order we set our options will also be the order they will appear in the menu. The options were listed from most to least used.
Before getting into the filtering, let’s restart AUX_STR so it can be safely used for our string block.
game_var;AUX_STR;""
Let’s take the two top options first. They share the same condition regarding the status of learned skills but opposite binary on the learned skill side. In both cases, we can check if value of LEARNED_SKILLS and UNIT_EQUIPPED_SKILLS match their corresponding dummies.
if;"{v:LEARNED_SKILLS}" != "Empty_Skill_List"
    if;"{v:UNIT_EQUIPPED_SKILLS}" == 'Add_New_Skill'
        #...
    else
        #...
    end
end
As these may be the starting ends of a chain, we need to settle them as the text for the first option followed by a comma.
It should look like this:
if;"{v:LEARNED_SKILLS}" != "Empty_Skill_List"
    if;"{v:UNIT_EQUIPPED_SKILLS}" == 'Add_New_Skill'
        game_var;AUX_STR;"Add,"
    else
        game_var;AUX_STR;"Swap,"
    end
end
For Remove, the only condition is that our skill is something other than the dummy. This time, we’ll increment our variable with the Remove option instead of setting it, as it can either be the first option or come after Swap.
if;"{v:UNIT_EQUIPPED_SKILLS}" != "Add_New_Skill"
    game_var;AUX_STR;"{v:AUX_STR}" + "Remove,"
    #...
end
Same thing for Reorder, but checking if our selected skill isn’t the first index in our tuple.
#...
if;unit.get_field('EquippedSkills')[0] != '{v:UNIT_EQUIPPED_SKILLS}'
    game_var;AUX_STR;"{v:AUX_STR}" + "Reorder,"
end
We wrap it up by setting a choice, acting as our second menu.
choice;SKILL_SWAP_OPERATION;;{v:AUX_STR}Cancel;40;backable
It may not look elegant but we have no need to add an extra line just to stich Cancel in our menu. It will only be used in single particular case where none of the other options is eligible.
The complete structure should look like this:
game_var;AUX_STR;""
if;"{v:LEARNED_SKILLS}" != "Empty_Skill_List"
    if;"{v:UNIT_EQUIPPED_SKILLS}" == 'Add_New_Skill'
        game_var;AUX_STR;"Add,"
    else
        game_var;AUX_STR;"Swap,"
    end
end
if;'{v:UNIT_EQUIPPED_SKILLS}' != 'Add_New_Skill'
    game_var;AUX_STR;"{v:AUX_STR}" + "Remove,"
    if;unit.get_field('EquippedSkills')[0] != '{v:UNIT_EQUIPPED_SKILLS}'
        game_var;AUX_STR;"{v:AUX_STR}" + "Reorder,"
    end
end
choice;SKILL_SWAP_OPERATION;;{v:AUX_STR}Cancel;40;backable
Following it, we can set our option branches checkers, and get them to pre-emptively call each individual event:
if;'{v:SKILL_SWAP_OPERATION}' == 'Remove'
    trigger_script;Skill_Swap_Remove (Global Skill_Swap_Remove);
elif;'{v:SKILL_SWAP_OPERATION}' == 'Reorder'
    trigger_script;Skill_Swap_Reorder (Global Skill_Swap_Reorder);
elif;'{v:SKILL_SWAP_OPERATION}' == 'Add'
    trigger_script;Skill_Swap_Add (Global Skill_Swap_Add);{unit}
elif;'{v:SKILL_SWAP_OPERATION}' == 'Swap'
    trigger_script;Skill_Swap_Replace (Global Skill_Swap_Replace);
end
Complete script
game_var;EXIT_SKILL_SWAP;False
game_var;AUX_STR;""
if;"{v:LEARNED_SKILLS}" != "Empty_Skill_List"
    if;"{v:UNIT_EQUIPPED_SKILLS}" == 'Add_New_Skill'
        game_var;AUX_STR;"Add,"
    else
        game_var;AUX_STR;"Swap,"
    end
end
if;'{v:UNIT_EQUIPPED_SKILLS}' != 'Add_New_Skill'
    game_var;AUX_STR;"{v:AUX_STR}" + "Remove,"
    if;unit.get_field('EquippedSkills')[0] != "{v:AUX_SKILL}"
        game_var;AUX_STR;"{v:AUX_STR}" + "Reorder,"
    end
end

choice;SKILL_SWAP_OPERATION;;{v:AUX_STR}Cancel;40;backable

if;'{v:SKILL_SWAP_OPERATION}' == 'Remove'
    trigger_script;Skill_Swap_Remove (Global Skill_Swap_Remove);
elif;'{v:SKILL_SWAP_OPERATION}' == 'Reorder'
    trigger_script;Skill_Swap_Reorder (Global Skill_Swap_Reorder);
elif;'{v:SKILL_SWAP_OPERATION}' == 'Add'
    trigger_script;Skill_Swap_Add (Global Skill_Swap_Add);{unit}
elif;'{v:SKILL_SWAP_OPERATION}' == 'Swap'
    trigger_script;Skill_Swap_Replace (Global Skill_Swap_Replace);
end
Step 8: Build the operations
At this point you may do them in whichever order you want, however they are ordered by complexity. They also share lines of code and those won’t be explained past the first occurence.
All of the operations will use EquippedSkills tuple. Retrieving its value, then changing one of the indexes, and end with an update with the corrected data.
Remember, every single option below has to be done in its respective named event. Check the table of contents or the previous step to get their names correctly if you haven’t created them already.
Step 8.A: Remove
Goal is simple, check which of the skills in our tuple is the one selected, then build a new tuple without it. We must start by emptying AUX_STR.
Next, we check which index in EquippedSkills matches our skill. Since we’re building the tuple again, we want to check the False output and stack that information in our string.
for;FETCHED_SKILL;unit.get_field('EquippedSkills')
    if;'{FETCHED_SKILL}' != '{v:UNIT_EQUIPPED_SKILLS}'
        game_var;AUX_STR;"{v:AUX_STR}" + "'{FETCHED_SKILL}',"
    end
endf
All that is left to do is remove the skill from the unit and update the field with the new tuple data.
remove_skill;{unit};{v:UNIT_EQUIPPED_SKILLS}
set_unit_field;{unit};EquippedSkills;[{v:AUX_STR}]
The end result should be:
game_var;AUX_STR;""
for;FETCHED_SKILL;unit.get_field('EquippedSkills')
    if;'{FETCHED_SKILL}' != '{v:UNIT_EQUIPPED_SKILLS}'
        game_var;AUX_STR;"{v:AUX_STR}" + "'{FETCHED_SKILL}',"
    end
endf
remove_skill;{unit};{v:UNIT_EQUIPPED_SKILLS}
set_unit_field;{unit};EquippedSkills;[{v:AUX_STR}]
Step 8.B: Reorder
Reorder is almost identical to remove. We’ll only change the first line to set the selected skill as AUX_STR’s value.
game_var;AUX_STR;"'{v:UNIT_EQUIPPED_SKILLS}',"
By doing this, the new tuple will start with the selected skill data as index 0. So we just need to remove original entry.
We can copy the remaining structure of 8.A, and delete the line that removes our selected skill. The skill is being kept after all.
for;FETCHED_SKILL;unit.get_field('EquippedSkills')
    if;'{FETCHED_SKILL}' != '{v:UNIT_EQUIPPED_SKILLS}'
        game_var;AUX_STR;"{v:AUX_STR}" + "'{FETCHED_SKILL}',"
    end
endf

`remove_skill;{unit};{v:UNIT_EQUIPPED_SKILLS}`

set_unit_field;{unit};EquippedSkills;[{v:AUX_STR}]
The end result should be:
game_var;AUX_STR;"'{v:UNIT_EQUIPPED_SKILLS}',"
for;FETCHED_SKILL;unit.get_field('EquippedSkills')
    if;'{FETCHED_SKILL}' != '{v:UNIT_EQUIPPED_SKILLS}'
        game_var;AUX_STR;"{v:AUX_STR}" + "'{FETCHED_SKILL}',"
    end
endf
set_unit_field;{unit};EquippedSkills;[{v:AUX_STR}]
Step 8.C: Add
This time, we’ll need to access our right panel. Turns out, we can’t as that is a static information window.
The workaround for this is building a menu using the exact same properties to cover it completely.
choice;UNIT_LEARNED_SKILLS;Learned Skills;{v:LEARNED_SKILLS};100;vert;top_right;;;type_skill;{v:SKILL_SWAP_CAP},1;scroll_bar;backable
The selected skill can be added directly to our unit.
give_skill;{unit};{v:UNIT_LEARNED_SKILLS}
And then to our tuple. As usual, we will have to convert it into a string, then add our new skill, and convert it back into a tuple. This time, it can be done directly into the ','.join() method.
game_var;LIST_STRING;','.join(["'" + s + "'" for s in unit.get_field('EquippedSkills')]) + ",'{v:UNIT_LEARNED_SKILLS}'"
There’s still the possibility, even if marginal, that a player may remove all of the equipped skills first, which can lead to a major error in our system.
It can be patched by checking the tuple size first, and take the selected skill directly as the new tuple value. We can save a bit of trouble by copying the value from UNIT_LEARNED_SKILLS into a string with the proper formatting.
if;len(unit.get_field('EquippedSkills')) > 0
    game_var;AUX_STR;",'{v:AUX_UNIT_LEARNED_SKILLS}'"
else
    game_var;AUX_STR;"'{v:AUX_UNIT_LEARNED_SKILLS}'"
end
#...
Of course, this means we have to fix the previous line with the string in mind. and move it past the previous condition.
#...
game_var;AUX_STR;','.join("'" + s + "'" for s in unit.get_field('EquippedSkills')) + "{v:AUX_STR}"
The last thing we have to do is to address the backable set on our choice command. When the menu is cancelled, the variable UNIT_LEARNED_SKILLS will still “BACK” as its new value, which isn’t a valid skill. We have to encapsulate all of the code below the choice command.
if;'{v:UNIT_LEARNED_SKILLS}' != 'BACK'
    #...
end
Last, we have to update the field.
The end result should be:
choice;UNIT_LEARNED_SKILLS;Learned Skills;{v:LEARNED_SKILLS};100;vert;top_right;;;type_skill;{v:SKILL_SWAP_CAP},1;scroll_bar;backable
if;'{v:UNIT_LEARNED_SKILLS}' != 'BACK'
    give_skill;{unit};{v:UNIT_LEARNED_SKILLS}
    if;len(unit.get_field('EquippedSkills')) > 0
        game_var;AUX_STR;",'{v:AUX_UNIT_LEARNED_SKILLS}'"
    else
        game_var;AUX_STR;"'{v:AUX_UNIT_LEARNED_SKILLS}'"
    end
    game_var;AUX_STR;','.join("'" + s + "'" for s in unit.get_field('EquippedSkills')) + "{v:AUX_STR}"
    set_unit_field;{unit};EquippedSkills;[{v:AUX_STR}]
end
Step 8.D: Replace
In theory, Replace should be a direct combination of Add and Remove, but there is more to do if you really want to commit to the idea of slots. In this case, skill being added has to be displayed in the same position as the one that was removed.
We’ll start by taking the pieces that work from those two elements. From Add, we’ll take the menu structure and “BACK” condition, from Remove we take the AUX_STR reset and the field loop.
choice;UNIT_LEARNED_SKILLS;Learned Skills;{v:LEARNED_SKILLS};100;vert;top_right;;;type_skill;{v:SKILL_SWAP_CAP},1;scroll_bar;backable
if;'{v:UNIT_LEARNED_SKILLS}' != 'BACK'
    game_var;AUX_STR;""
    for;FETCHED_SKILL;unit.get_field('EquippedSkills')
        #...
    endf
end
For our bit of original code, we want to check which slot our equipped skills is in.
if;'{FETCHED_SKILL}' == '{v:UNIT_EQUIPPED_SKILLS}'
    #...
else
    #...
end
Let’s address the else branch first. When it comes to the engine side, the skills are displayed in the order they were added to the unit. This means that to manipulate that visual aspect, we need to remove all of the skills and add them again.
We’ll do just that and start building our tuple as well.
#...
game_var;AUX_STR;"{v:AUX_STR}" + "'{FETCHED_SKILL}',"
remove_skill;{unit};{FETCHED_SKILL};no_banner
give_skill;{unit};{FETCHED_SKILL};no_banner
This chunk of code can be copied onto the True output side, replacing FETCHED_SKILL with the corresponding variables.
#...
game_var;AUX_STR;"{v:AUX_STR}" + "'{v:UNIT_LEARNED_SKILLS}',"
remove_skill;{unit};{v:UNIT_EQUIPPED_SKILLS}
give_skill;{unit};{v:UNIT_LEARNED_SKILLS}
Here we’re letting the engine use the default alerts for both skill commands, you may use no_banner to suppress it or even add a custom alert if you want to.
At last, we update the field.
The end result should be something like:
choice;UNIT_LEARNED_SKILLS;Learned Skills;{v:LEARNED_SKILLS};100;vert;top_right;;;type_skill;{v:SKILL_SWAP_CAP},1;scroll_bar;backable
if;'{v:UNIT_LEARNED_SKILLS}' != 'BACK'
    game_var;AUX_STR;""
    for;FETCHED_SKILL;unit.get_field('EquippedSkills')
        if;'{FETCHED_SKILL}' == '{v:UNIT_EQUIPPED_SKILLS}'
            game_var;AUX_STR;"{v:AUX_STR}" + "'{v:UNIT_LEARNED_SKILLS}',"
            remove_skill;{unit};{v:UNIT_EQUIPPED_SKILLS}
            give_skill;{unit};{v:UNIT_LEARNED_SKILLS}
        else
            game_var;AUX_STR;"{v:AUX_STR}" + "'{FETCHED_SKILL}',"
            remove_skill;{unit};{FETCHED_SKILL};no_banner
            give_skill;{unit};{FETCHED_SKILL};no_banner
        end
    endf
    set_unit_field;{unit};EquippedSkills;[{v:AUX_STR}]
end
Step 8.E: Replace on level up
Here we’ll use an event that was being called in 4.4, Skill_Swap_Level_Up. It will be the one triggered when a skill is unlocked but the unit lacks available slots to auto-equip it.
This event is almost an identical copy of replace, with the only difference being the menu, which will be the one used in Skill_Swap_Setup. Copy the whole code from 8.D for now.
Next, we’ll add two lines of code from 5.2, the first will be added to the top of our event script, and the other will replace a counterpart from 8.D.
The one being added is the line that builds the string for or menu, no adjustment is required.
game_var;EQUIPPED_SKILLS;','.join(s for s in unit.get_field('EquippedSkills'))
Then, we will replace choice command with the one from 5.2. We need to change the title and remove the associated event. None of the processing done in 5.2 is needed here as this menu will always be full.
From this:
choice;UNIT_EQUIPPED_SKILLS;Equipped Skills;{v:EQUIPPED_SKILLS};100;vert;top_left;;Skill_Swap_Operations (Global Skill_Swap_Operations);type_skill;
To this:
choice;UNIT_EQUIPPED_SKILLS;Replace skill?;{v:EQUIPPED_SKILLS};100;vert;top_left;;;type_skill;
At last, replace UNIT_LEARNED_SKILLS with AUX_SKILL. It still contains the data retrieved at Check_Skill_Unlock.
The end result should be something like:
game_var;EQUIPPED_SKILLS;','.join(s for s in unit.get_field('EquippedSkills'))
choice;UNIT_EQUIPPED_SKILLS;Replace skill?;{v:EQUIPPED_SKILLS};100;vert;top_left;;;type_skill;backable
if;'{v:UNIT_EQUIPPED_SKILLS}' != 'BACK'
    game_var;AUX_STR;""
    for;FETCHED_SKILL;unit.get_field('EquippedSkills')
        if;'{FETCHED_SKILL}' == '{v:UNIT_EQUIPPED_SKILLS}'
            game_var;AUX_STR;"{v:AUX_STR}" + "'{FETCHED_SKILL}',"
            remove_skill;{unit};{v:UNIT_EQUIPPED_SKILLS}
            give_skill;{unit};{v:AUX_SKILL}
        else
            game_var;AUX_STR;"{v:AUX_STR}" + "'{FETCHED_SKILL}',"
            remove_skill;{unit};{FETCHED_SKILL};no_banner
            give_skill;{unit};{FETCHED_SKILL};no_banner
        end
    endf
    set_unit_field;{unit};EquippedSkills;[{v:AUX_STR}]
end
And now we have the whole system working. Bear in mind that this version of ‘replace on level up’ isn’t asking for the confirmation on the action. Users may replace skills by accident if they go too fast.
This extra piece can be built using things covered in this guide, so take it as a challenge if you care for this particular scenario.
Step 9: Test the system
Congratulations, you have successfully build a skill swap system using the event editor. You can now test all the interactions and thinker with it to fill your needs.